Ready to stop scrambling and start shipping? This 5-Step Content Production Workflow shares battle-tested content production tips to streamline your creator workflow, batch content like a pro, nail social media planning, and effortlessly repurpose content across platforms. From ideation to publish-and-promote, you’ll learn how to set up repeatable systems, plan smarter, and reclaim your time—without losing your creative spark. Pro gear + simple tools help, too: a camera tripod, ring light, USB microphone, desk organizer, and a trusty content planner keep everything crisp, organized, and on schedule. Save hours, grow faster, create happier.
Introduction: Content Production Tips and the 5-Step Creator Workflow to Save Hours
If you’ve ever felt like you’re sprinting on a treadmill of posts, captions, and edits—with no end in sight—this guide is your gentle exhale. Here’s the truth most creators learn the hard way: you don’t need more hustle; you need a smarter creator workflow. In this introduction, we’ll set the tone with simple, repeatable content production tips that help you save hours every single week, without losing your voice or your sanity. Think cozy, clear systems: a dedicated idea inbox, a weekly plan you can trust, and a few intentional tools that make creating feel lighter than ever.
Over the next sections, we’ll walk through a 5-step rhythm I return to again and again: capture, plan, batch, polish, and publish. First, collect your sparks—notes on your phone, a sticky in your browser, or a tidy section in your content planner. Next comes social media planning: map themes, platforms, and deadlines so you always know what you’re making and why. Then we batch content—record all your Reels in one sitting, outline three blog posts at once, or shoot a week of product photos in an hour. Set the scene so creation is easy: a camera tripod you don’t have to wrangle, a ring light for soft, consistent glow, and a USB microphone that keeps your audio crisp. Clear your space with a simple desk organizer and watch your focus come back. After that, polish: light edits, on-brand covers, caption frameworks, and CTAs that feel like invitations, not pressure.
Finally, publish and repurpose content with intention. One core idea can live many lives—a tutorial turns into a carousel, a blog snippet becomes an email teaser, a livestream yields a week of short clips. Schedule what you can, leave a little room for your in-the-moment magic, and let your system do the heavy lifting on repeat. As you read on, borrow what fits, skip what doesn’t, and shape a flow that feels like you. When your process is calm and clear, creativity has space to bloom—and your time stretches further than you thought possible.
Step 1: Plan Your Week—Social Media Planning with a Content Planner
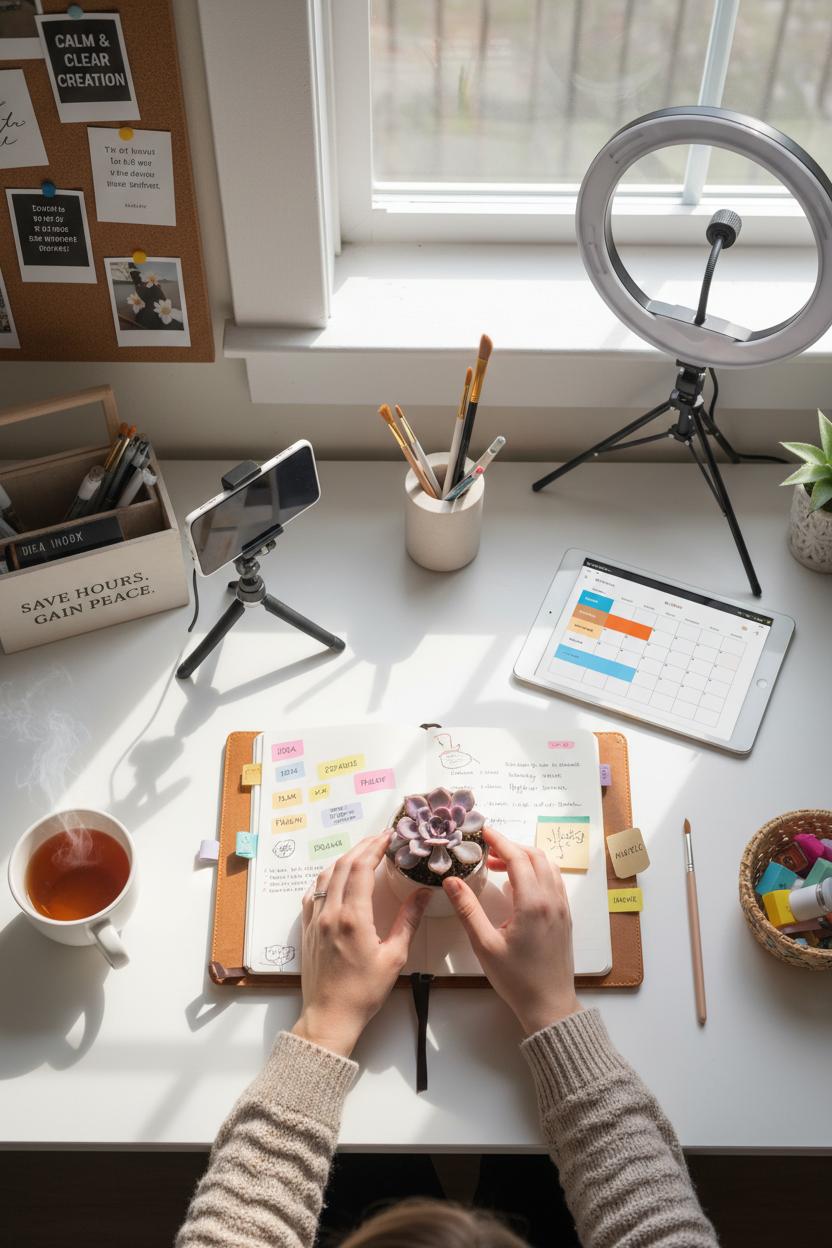
Pour a fresh coffee, crack open your content planner, and start by giving your week a cozy theme. Pick one big idea—like “morning routines” or “summer skincare”—and let it anchor everything. I like to map the week in a simple grid: platforms across the top, days down the side, and one clear outcome in the corner (grow saves, drive clicks, or spark comments). This is where social media planning feels less like chaos and more like a calm, color-coded ritual. It sets the tone for your creator workflow, so you’re not chasing trends—you’re guiding them with intention.
Next, do a 30-minute idea dump. Jot hooks, story beats, and quick value bites that solve a tiny problem or inspire a mood. Circle your best five and assign them to formats: one carousel, two Reels, a blog mini, and an email snippet. Add tiny notes so future-you can glide: “B-roll at window,” “CTA: save for later,” “Need product shot.” These micro-prompts are sneaky-good content production tips because they keep you from stalling when it’s time to film. Then sketch a repurpose content plan: one Reel becomes a Pinterest Idea Pin, that carousel becomes two story slides, and the blog mini turns into a LinkedIn post. You’re not making more; you’re making smarter.
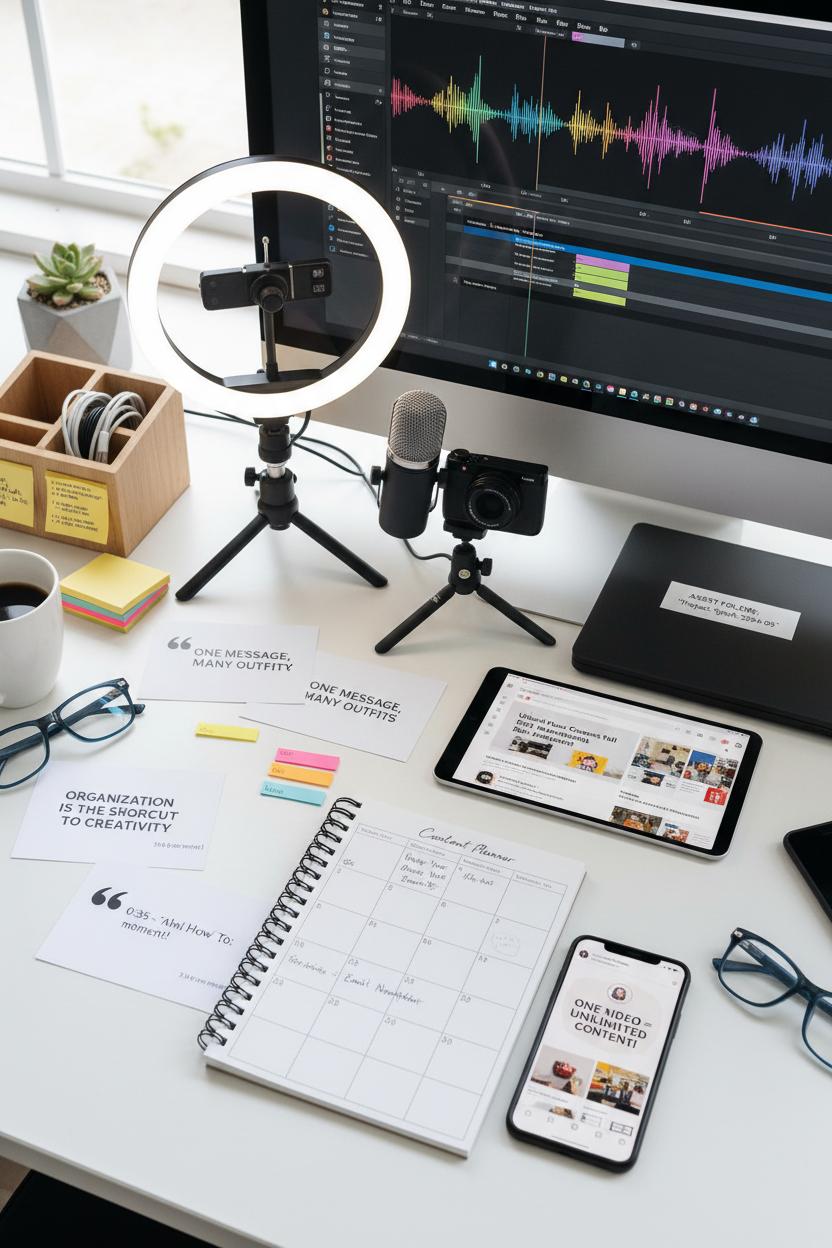
Prep your visuals before you ever hit record. Write a mini shot list and lay out your gear: camera tripod ready at eye level, ring light softened with a diffuser, USB microphone plugged in for crisp voiceovers. Clear your space with a tidy desk organizer so props and memory cards don’t vanish when the light is perfect. Time-block a single “create” window to batch content—film all A-roll in one go, then snag quick B-roll cutaways (coffee pour, typing, behind-the-scenes). Your future editing self will be delighted.
Finally, give your planner a gentle rhythm: theme on Monday, draft captions Tuesday, film Wednesday, edit Thursday, schedule Friday. Add checkboxes for “thumbnail,” “hashtags,” and “link added” so nothing slips. Keep a running note of what performed well, and repeat what worked next week. Planning doesn’t box you in; it frees you up—so when inspiration hits, you already have a place to put it.
Step 2: Fast Studio Setup—Camera Tripod, Ring Light, and USB Microphone
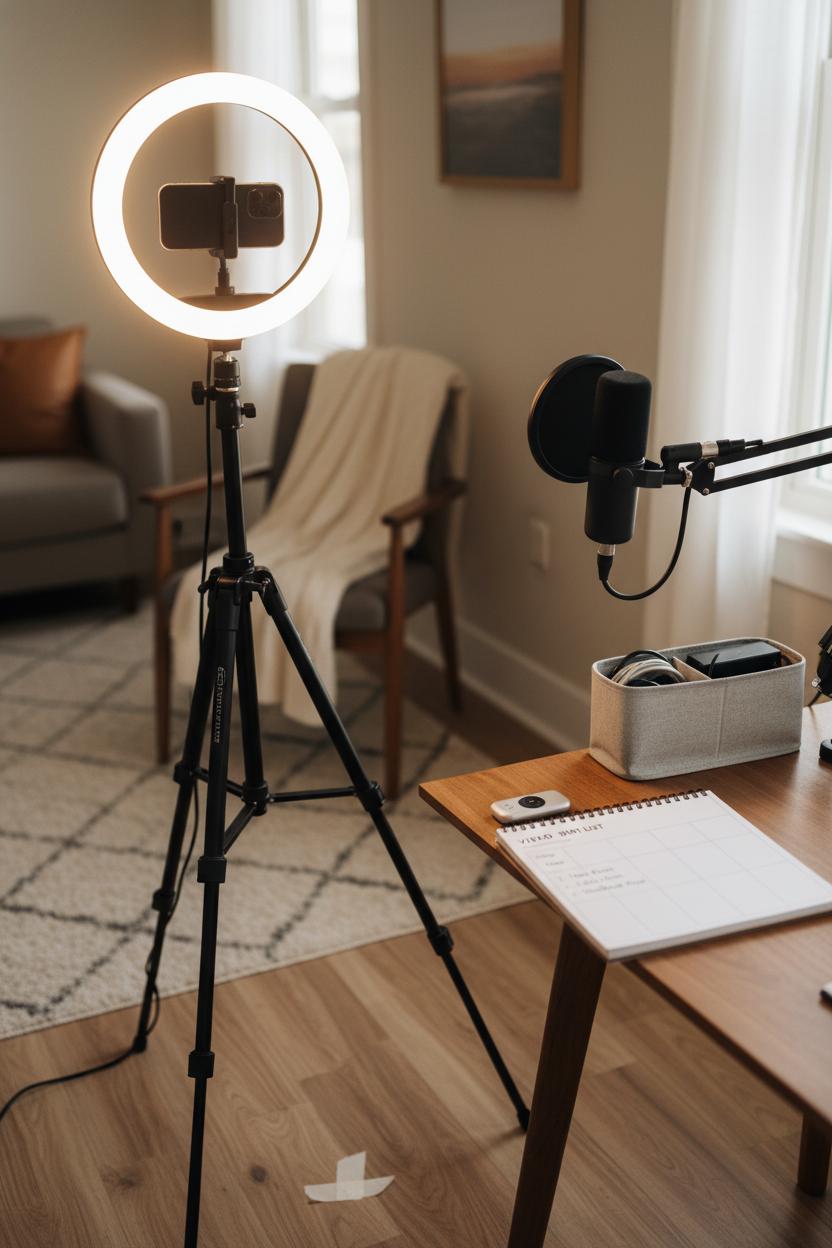
Before you hit record, give yourself a mini studio that sets up in under five minutes. Clear a small corner, pull out your camera tripod, and set your phone or camera at eye level so your posture looks natural and your background feels intentional. Slide a ring light just off-center at a soft 45-degree angle, then dial in a warm setting that flatters skin without washing out color. Mark your floor with a tiny piece of painter’s tape where the tripod legs land, and place another on the desk so your frame is consistent every time. This tiny ritual becomes muscle memory in your creator workflow, and it’s one of those quiet content production tips that saves more time than any new app. Keep a remote shutter or timer ready, and stash spare batteries or a power bank nearby so you never pause mid-flow.
Next, treat audio like a cozy blanket. Plug in a USB microphone and place it about a hand’s length from your mouth; a simple pop filter keeps your s’s and p’s silky. Do a 10-second test with a clap at the start so syncing is painless later. If your room echoes, drape a throw over a chair, lay down a rug, or record near a closet—soft textures do wonders. Tuck cables into a little desk organizer so nothing snags when you pivot from talking head to B-roll. Keep your content planner open beside you with a simple shot list: intro, three points, call to action, thumbnail pose. That tiny bit of social media planning lets you batch content without decision fatigue and keeps you on-message across platforms.
Lock in repeatable settings so your studio feels like a switch you flip. Save your ring light brightness, note your tripod height, and set a neutral white balance so edits match from clip to clip. When you wrap, keep the tripod collapsed and the mic coiled in one tote so setup next time is effortless. While the gear’s out, film a few extra B-roll angles and thumbnail photos—you’ll repurpose content later for Reels, YouTube Shorts, and Pinterest Idea Pins. The goal isn’t perfection; it’s a reliable groove. With this fast studio setup, you’ll glide from idea to finished video in minutes, stacking wins and freeing hours for creativity.
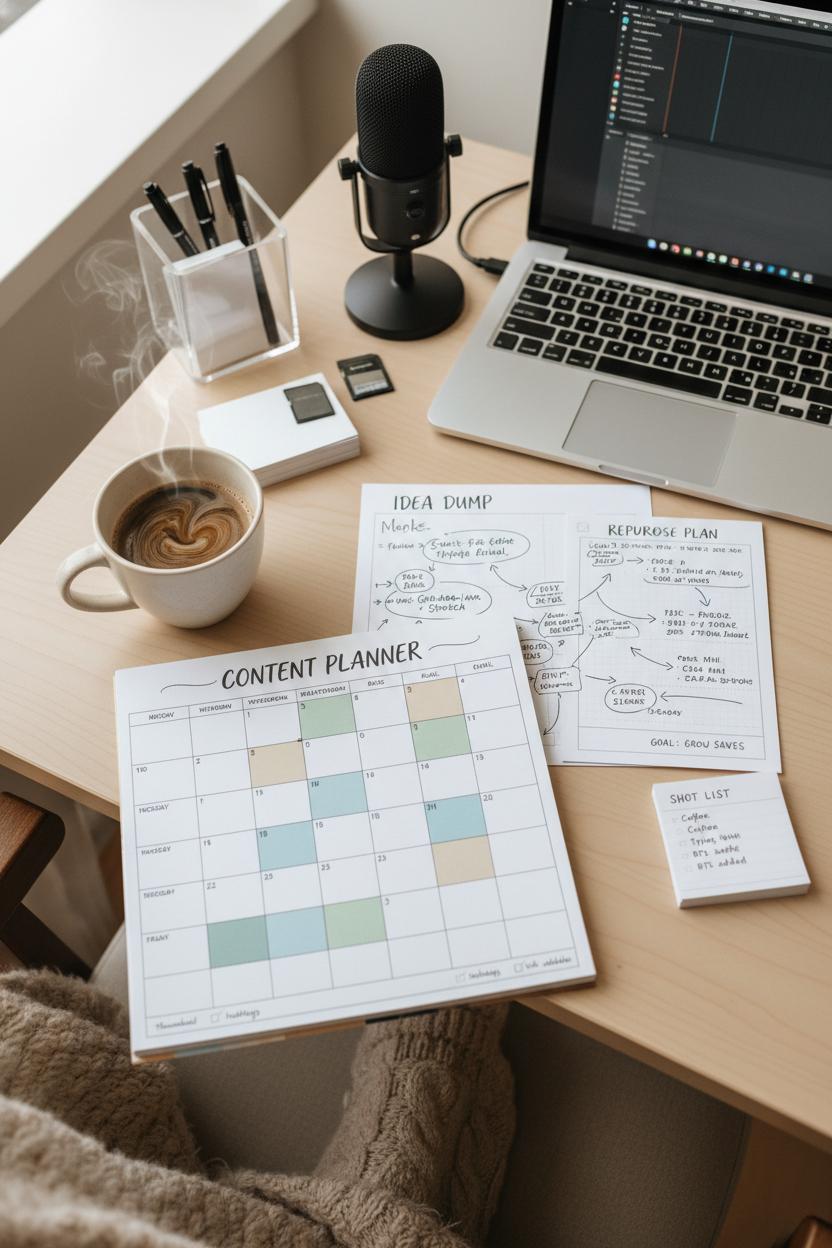
Step 3: Batch Content Efficiently—Outline, Script, and Shoot in Sessions
Think of batching as the cozy, candlelit dinner of your creator workflow: you set the table once, then enjoy multiple courses without running back to the kitchen each time. Start by opening your content planner and grouping ideas by theme, format, and platform so related pieces can be filmed back-to-back. Outline three to five posts at a time with simple beats—hook, key point, takeaway—then script only what needs precision (intros, CTAs, stats) and leave room for your natural voice to breathe. Keep a running shot list taped to your desk organizer so you can glide from A-roll to B-roll without second-guessing. This is one of those quietly powerful content production tips: the more decisions you make upfront, the more creative energy you save on shoot day.
When it’s time to create, treat your setup like a little studio ritual. Clear your workspace, lay out props, and stack wardrobe changes in order of appearance. Pop your phone or camera on a sturdy camera tripod, warm up your scene with a soft ring light, and plug in a USB microphone so your audio feels close and friendly. Press record and move through your outlines in a single sitting—same lighting, same angle, minimal fuss. You’ll be amazed how much you can capture when you’re not tearing down and rebuilding your set for every post. Between takes, slip in quick B-roll: typing hands, a coffee pour, your planner flip—future gold for reels and cutaways. As you go, rename files with intuitive labels so editing becomes a drag-and-drop dream later.
Before you wrap, jot down distribution notes right inside your planner: which clips become short-form, which quotes become captions, which tutorials get expanded into carousels. This is where you save the most hours—batch content now so you can repurpose content later without reinventing anything. Build a light social media planning grid for the next two weeks, slotting each asset where it fits best, and leave buffer days for timely trends. Walk away with a tidy folder of footage and a roadmap that stretches beyond a single post—proof that a warm, well-planned session can carry your feed farther than a dozen scattered sprints.
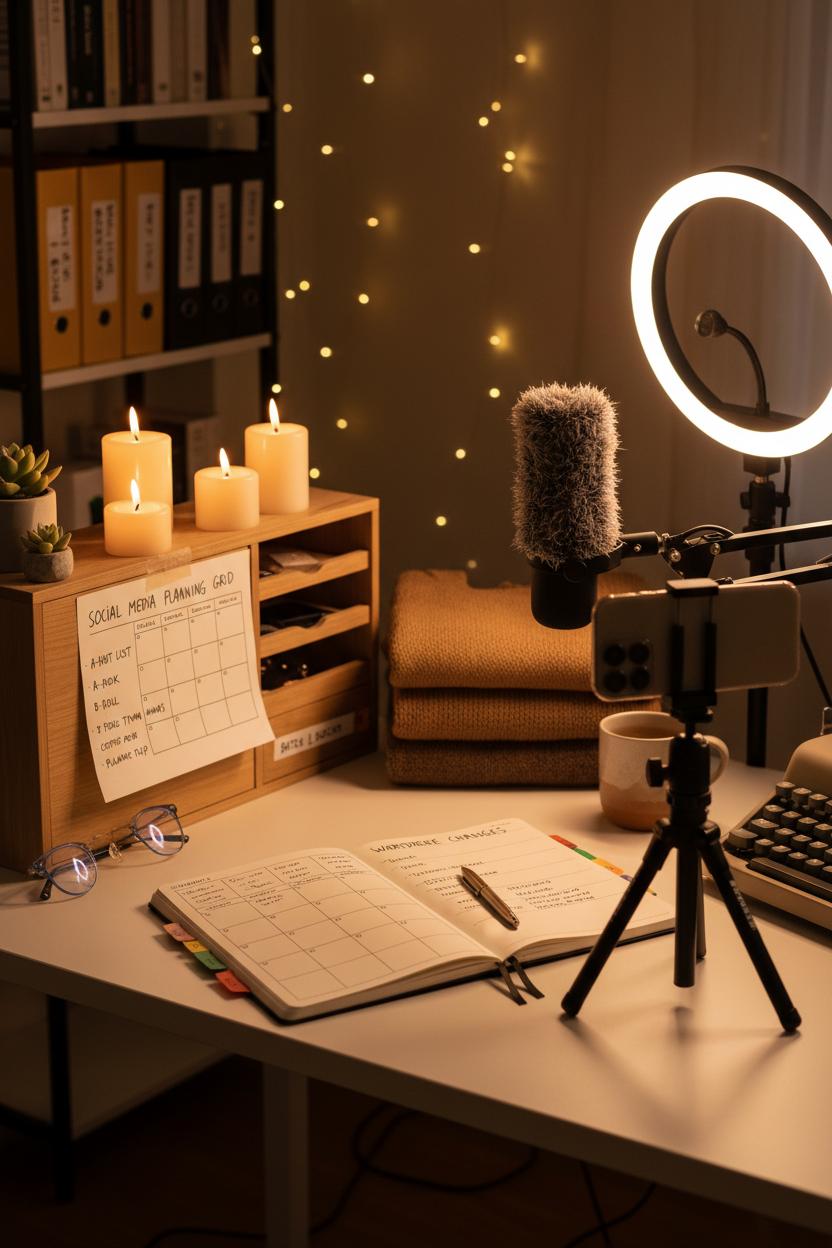
Step 5: Repurpose Content—Turn One Recording into Reels, Posts, and Blogs
You’ve done the heavy lift—now squeeze every last drop from it. Take that single recording you captured with your camera tripod steady, ring light glowing, and USB microphone crisp, and repurpose content like a pro. Start by pulling the strongest soundbites: the one-liners, the mini how-tos, the aha moments. Those become Reels and TikToks, stitched together with quick captions and a cover frame that echoes your brand. From there, clip a 20–30 second teaser to post on Stories and pin it to a highlight so new followers can find it later. The full video can live on YouTube or your website, while the transcript blooms into an SEO-friendly blog post, and your best takeaways transform into a carousel post and a couple of quotable graphics. This is the beating heart of an efficient creator workflow: one core message, many stylish outfits.
As you slice and stack pieces, give each format a clear job. Reels hook attention. Carousels teach. Blogs deepen trust. Emails invite connection. Keep a notes doc open with time stamps, pull quotes, and call-to-action ideas, and let your content planner guide the rollout so it feels intentional, not chaotic. If you love a good system, label your assets the same way every time and tuck them into a neat folder—your future self will thank you. A tidy desk organizer beside you means cords, SD cards, and sticky notes aren’t staging a mutiny while you batch content. This is one of those overlooked content production tips: organization is the shortcut to creativity.
Finally, thread everything together with gentle social media planning. Map a two-week arc from that one recording: Day 1 blog, Day 2 teaser Reel, Day 4 carousel, Day 6 email, Day 9 behind-the-scenes clip, Day 12 Q&A post. Repurpose content again a month later by reframing the angle or updating the hook. The message stays consistent, but the packaging keeps it fresh. Think of it like styling your favorite sweater for different seasons—you don’t need more clothes, just better pairings. That’s the calm, repeatable rhythm that saves hours and compounds reach, one recording spun into a whole wardrobe of posts.
Final Checklist: Creator Workflow Habits That Keep Saving You Hours
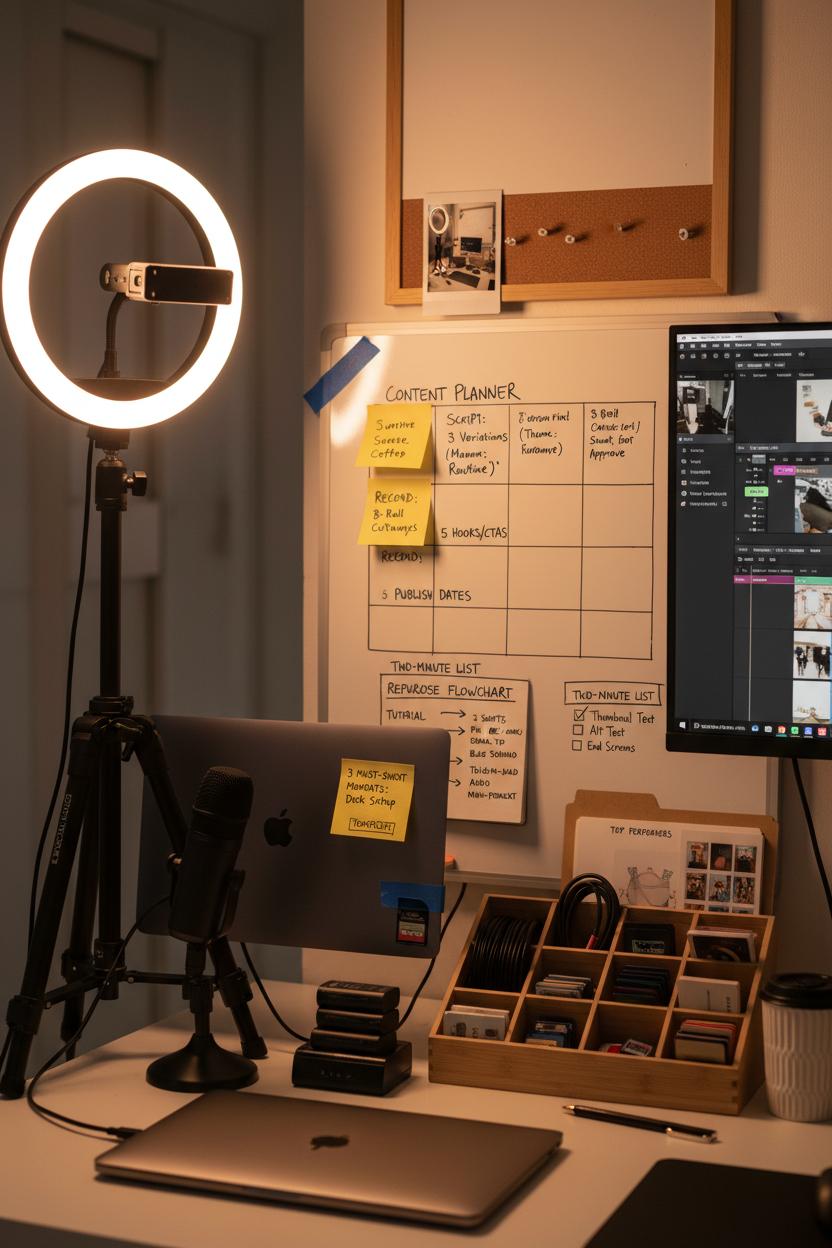
Before you close your laptop, do one generous sweep through this final checklist that turns a good creator workflow into an effortless habit. Stage tomorrow’s tools in plain sight so you glide into making mode: camera tripod extended to your height, ring light dialed to your favorite warmth, USB microphone plugged in and tested, batteries charged, and a spare SD card taped to your desk organizer. Open your template folder, reset file names to your standard format, and drop a sticky note with three must‑shoot moments on your monitor. These tiny rituals aren’t flashy, but they are quiet time-savers—the sort of content production tips that keep paying you back every single week.
Batch content like you’re prepping meals for future you. Choose a single theme or product line and script three variations at once; record all A‑roll in one sitting while the light and makeup match, then capture a quick stack of B‑roll cutaways. Pre-write five hooks and five CTAs, paste them into your caption bank, and load them into your content planner for easy drag-and-drop. During your weekly social media planning session, map one core idea across platforms, assign assets, and slot publish dates—then set reminders for shoot, edit, and approval checkpoints. Keep a running “two-minute list” for micro-tasks (thumbnail text, alt text, end screens) and clear it as a warm-up before deep work. End each session by exporting WIPs, syncing to cloud, and tagging clips with status labels so tomorrow’s self knows exactly where to pick up.
Build a tiny machine for momentum by deciding how you’ll repurpose content before you hit record. A longer tutorial becomes three shorts, a carousel, and an email tip; the best quote turns into a Pin, a Reel cover, and a blog subhead. Audio from a talking-head clip? Strip and polish it for a mini-podcast. Keep a “Top Performers” folder and revisit it monthly to refresh thumbnails or re-share seasonal winners. Corral cords, cards, and props in your desk organizer so resets take seconds, and snap a photo of your set when it’s dialed in to reconstruct it fast. The goal isn’t perfection—it’s flow. When your space, tools, and plans are always one step ahead, the ideas have room to bloom and the hours come back to you.
Conclusion
With this 5-step creator workflow—map themes, batch content, template and outline, schedule smart, and repurpose content—you’re set to save hours and stay inspired. Keep these content production tips close: protect planning time, simplify tools, and use social media planning to keep momentum. Pour a coffee, queue your posts, and let your ideas work twice as hard while you rest. Here’s your gentle nudge to create once, share everywhere, and enjoy the calm of a sustainable creative rhythm.