Ready to stop scrambling and start batching? This content creation workflow shows how to plan a week in 60 minutes with smart content planning, time blocking, and social media tips that boost creator productivity. Grab your content planner and a time blocking timer, set up your tripod with phone mount, ring light, and lavalier microphone, and watch your ideas flow into scroll-stopping posts. We’ll map themes, batch captions, and schedule like a pro—so you can create more in less time and stay consistent without the burnout. Pin this guide and let content batching become your new secret weapon.
Set Your Goals and Audience: Fast, Intentional Content Planning

Before you film a thing, take a breath and give yourself ten intentional minutes to decide what “winning” looks like for the next seven days. Open your content planner, sip something cozy, and choose one clear goal: grow email sign-ups, drive saves, or get replies that turn into DMs. That single focus becomes your north star. Next, pick one person you’re speaking to this week—niche her down until she feels like a real friend. What is she Googling at 11 p.m.? What small win would make her day easier? Jot three pain points and three quick wins you can deliver. Set a time blocking timer for two-minute sprints and translate each pain point into a format you already like to make: a bite-size tutorial, a story post, a checklist Pin, a 30-second pep talk. This alone streamlines your content creation workflow, because every piece now has a purpose and a person behind it. Sprinkle in social media tips where relevant, and keep your copy anchored in outcomes she actually wants.
With your goal and audience locked, sketch a mini map for the week: hooks, quick outlines, and the call to action that ties back to your focus. Note the assets you’ll need when it’s time to shoot—tripod with phone mount for steady hands, ring light for that clean, inviting glow, and a lavalier microphone so your voice sounds as confident as your message. This is where content planning meets content batching: group similar posts, batch write captions while you’re in the zone, and save filming for one cozy window when the light is perfect. Aim for one pillar topic that threads through the week so you can repurpose with ease—carousels become Reels, Reels become blog snippets, blog snippets become Pins. Tiny, repeatable systems are the heartbeat of creator productivity. Keep your ideas list short, your CTAs consistent, and your time blocks sacred. You’ll feel less scattered and more magnetic, and by the time you press record, you’ll know exactly who you’re serving and why your content matters—fast, intentional, and ready to work for you all week long.
Build Your Content Planner: Templates, Themes, and Tags that Save Time
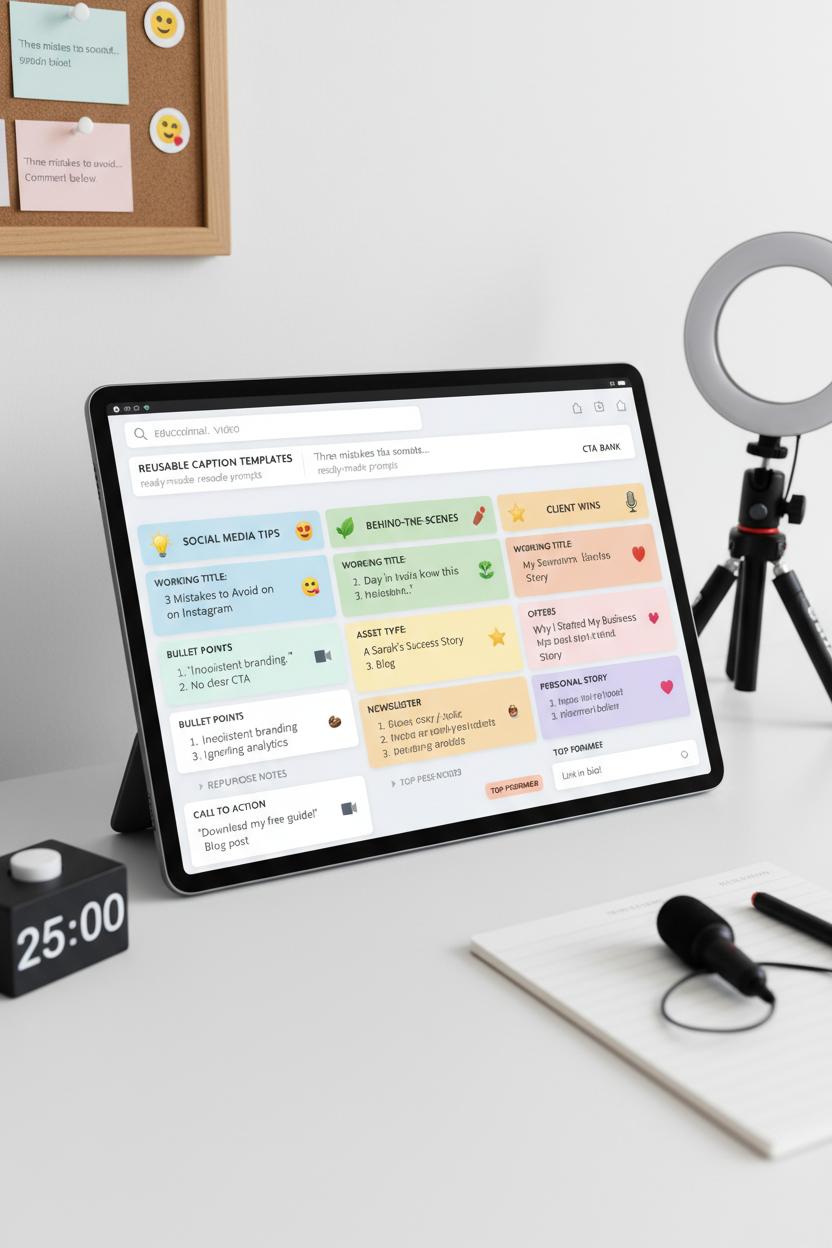
Before you open your camera roll, build a simple system that does the heavy lifting. Start with themes: pick 3–5 content pillars that reflect what you actually talk about—your offers, behind-the-scenes, client wins, social media tips, and your personal story—and assign them to days. That single move turns content planning into plug-and-play. In your content planner (digital or paper), create weekly templates for each pillar: a working title, hook, bullet points, call to action, and repurpose notes. Add a slot for the asset type you’ll make (Reel, carousel, blog, newsletter) so your content creation workflow keeps you focused on outcomes, not endless ideas. I like color-coding pillars and adding emoji to make the week feel visual and inviting—think a mood board you actually execute.
Next, layer in tags. Tags are your backstage crew: they help you find, batch, and repurpose without digging through folders. Use tags for format (video, static, story), vibe (educational, inspiring, cozy), stage (draft, filming, scheduled), and purpose (grow, nurture, sell). When you want to fill Thursday’s “tips” slot, filter by “educational + video” and your library hands you ready-made prompts. Keep reusable caption templates—hooks like “I wish I knew this sooner…” or “Three mistakes to avoid…”—and a bank of CTAs so writing takes minutes. This makes revisiting old winners effortless: tag past posts with “top-performer” and refresh them with a new angle.
Finally, batch like a pro. Once your week is templated, schedule one focused block for filming using a time blocking timer and work through all video tags in one sitting. Set up a tripod with phone mount, click on a ring light, clip a lavalier microphone, and glide through your shot list without tearing down between scenes—true content batching magic. Then batch captions and covers in a second block, and schedule in a third. The result is momentum you can feel: your calendar is tidy, decisions are light, and creator productivity rises because the system handles the micro-choices. By the time Monday rolls in, your themes, templates, and tags are doing the quiet work—so you can show up, create, and actually enjoy the process.
Time-Box Your Session: Use a Time Blocking Timer to Focus and Finish

Time-boxing is the secret sauce that keeps a content creation workflow from spilling into the rest of your day. Grab a time blocking timer, flip your phone to Do Not Disturb, and give yourself a clear container for focus. When your brain knows there’s a start and a finish, it shows up differently—sharper, faster, and way less tempted to “just check one thing.” Before you press start, glance at your content planner and decide exactly what you’ll finish in this block. That tiny moment of content planning eliminates decision fatigue and builds momentum. Think of it like a cozy, purposeful sprint: you’re not working forever, you’re working for 15… 20… maybe 25 minutes—then resetting. It’s the friendliest way to boost creator productivity without feeling like you’re hustling nonstop.
In a 60-minute session, stack your blocks with intention. Try 15 minutes to brainstorm hooks and headlines, 20 minutes to outline or script, and 25 minutes to record or design. If you’re filming, have your tripod with phone mount, ring light, and lavalier microphone ready so you can hit record the second the timer starts. That’s content batching at its best—one setup, multiple assets. As each block ends, stop exactly where you are, capture any stray ideas in your content planner, and move to the next task. You’ll be amazed how the “ding” becomes a finish line you actually look forward to. And as you wrap the hour, add captions, calls to action, and a few SEO keywords to your descriptions, then drop posts into your scheduler while the energy is high. Little social media tips like batching hashtags or saving templates in your notes app help you ship faster and keep everything on-brand.
The magic is in making your blocks realistic and repeatable. If an idea needs more time, park it for tomorrow’s block instead of blowing up your day. Protect your timer and make it a ritual—tea poured, playlist low, task chosen. The more consistently you use it, the more your mind associates that gentle countdown with focus and finish. Over a week, these small, protected sprints turn into a complete content plan and a full queue, minus the overwhelm. That’s the quiet power of time-boxing for creator productivity: less dithering, more done.
Content Batching Made Simple: Outline, Script, and Shoot in Blocks
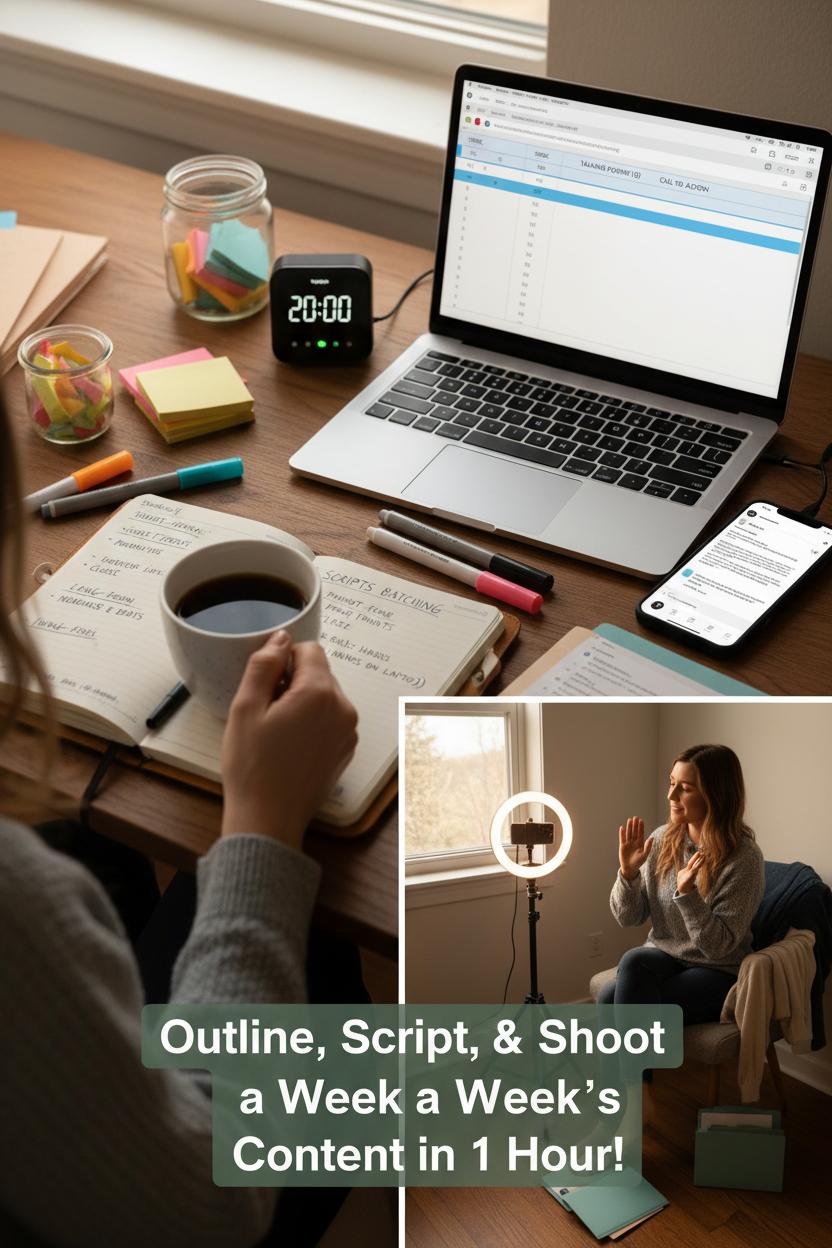
Start by making the outline phase feel cozy and quick. Pour a coffee, open your content planner, and set a time blocking timer for a focused 20-minute sprint. Jot down five to seven topics tied to your content pillars, then sketch a one-line hook, three talking points, and a simple call to action for each. Think of it as breadcrumbing your week in one sitting. This upfront content planning trims decision fatigue and keeps your content creation workflow consistent. If you’re stuck, scroll your comments and DMs for questions to answer, or repurpose a high-performing post into a new angle. Keep it light, fast, and imperfect—outline for momentum, not masterpieces.
Next, script in batches with breezy structure. For short-form, write a punchy first line, three proof points, and a close; for long-form, keep headlines and beats in bullet form you can glance at while filming. Drop in quick B-roll ideas beside each point—hands-on laptop, coffee pour, product close-up—so you’re pre-visualizing while you write. This simple template becomes your repeatable system and supercharges creator productivity. Save scripts to a single notes doc and label them with keywords and intended platforms. Bonus social media tips: plan one reusable CTA for the week, prep a caption bank with three rotating hooks, and note any on-screen text you’ll want to add later to streamline editing.
When you’re ready to record, shoot everything in one cozy block. Set up by a window, then add a ring light for consistent warmth. Mount your phone on a tripod with phone mount, clip on a lavalier microphone for crisp audio, and hit record. Film all your A-roll first—changing tops or accessories between takes to create variety—then capture two minutes of B-roll per script. Keep your timer running to stay snappy; you’ll be surprised how much you can record in 20–30 minutes. Pro tip: clap at the start of each take for easier syncing, and store files in a simple folder system labeled by day. Content batching like this compresses the chaos into calm, so your content creation workflow feels light and repeatable. In under an hour, you’ve outlined, scripted, and shot a week’s worth of posts—leaving you free to edit on autopilot and share with confidence.
Gear That Works: Tripod with Phone Mount, Ring Light, and a Lavalier Microphone
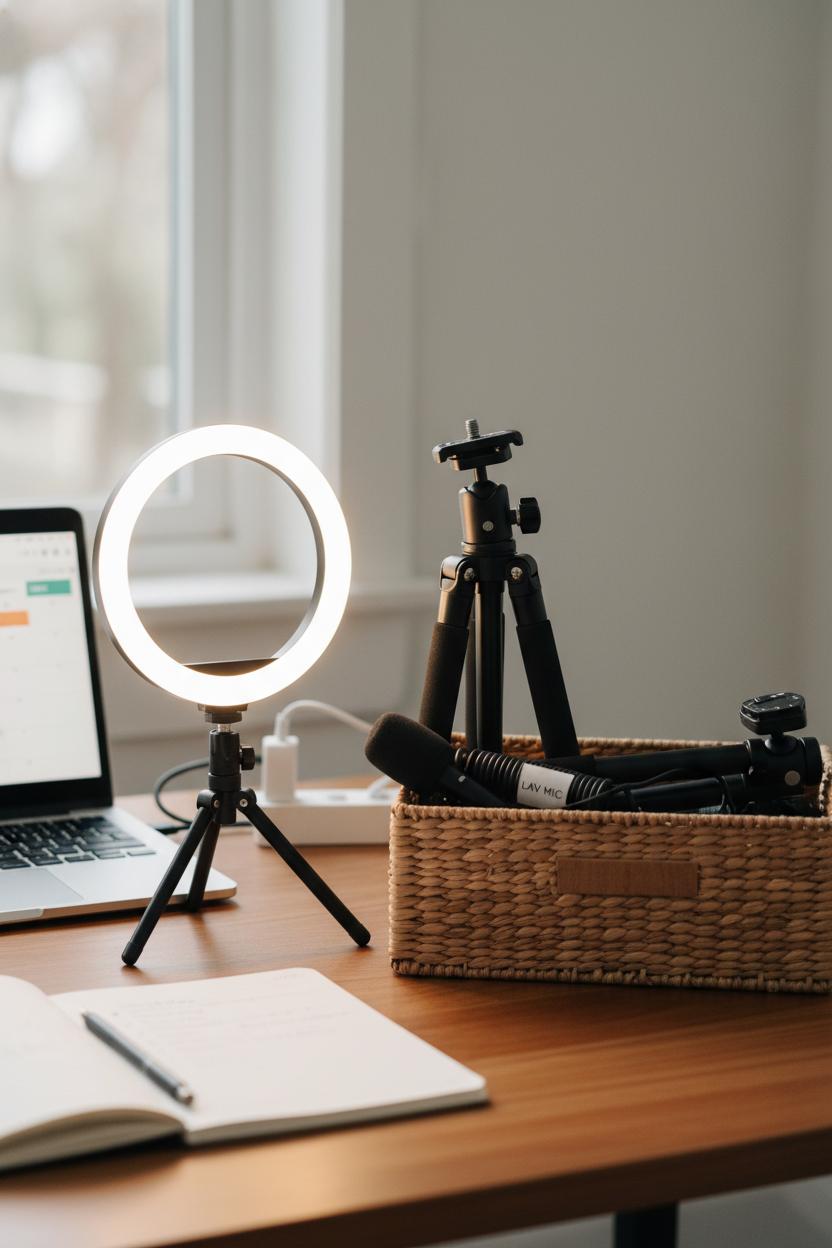
Before you press record, set the scene so your gear does the heavy lifting for you. A sturdy tripod with phone mount means your frame stays steady while you flow, no stacks of books or wobbly angles required. Add a ring light and suddenly the colors in your space look intentional—soft, fresh, and flattering—even on a cloudy afternoon. Clip on a lavalier microphone and your voice becomes the star: warm, clear, and close, without the echo of a big room. Together, this tiny trio turns your content creation workflow into a calm ritual instead of a scramble. It also builds visual and audio consistency across platforms, which is one of those unglamorous social media tips that quietly pays off week after week.
When it’s time for content batching, I set a time blocking timer for 20–30 minute sprints and treat each sprint like a mini shoot. Phone at eye level on the tripod, ring light just off-center at a 45-degree angle for a gentle glow, lavalier mic clipped mid-chest with the cable tucked away. Record a quick 10-second test for exposure and sound, then move. Batch your talking-head intros first, then your how-to steps, then your B-roll cutaways. Keep a content planner open beside you—your hooks, CTAs, and keywords already mapped from your content planning session—so you’re not hunting for ideas between takes. You’ll feel your creator productivity skyrocket because the setup never changes, only the message does. That’s the magic: you’re not reinventing the wheel; you’re just changing the caption.
Make this kit grab-and-go so you actually use it. Keep the tripod with phone mount folded in a basket by your desk, the ring light plugged in or charged, and the lavalier microphone wrapped and labeled so there’s zero cable chaos. If you film at a kitchen counter or in the yard, everything travels easily, which means you can chase good light without losing momentum. Think of the tripod as your reliable friend, the ring light as your golden hour on demand, and the lav mic as your secret confidence boost. With these three pieces in place, your content creation workflow feels simple and repeatable—leaving you free to focus on the storytelling that makes people stop scrolling.
Record Day Checklist: Audio, Lighting, and Framing for Consistent Quality
Record day is where your content creation workflow shifts from ideas on paper to cozy, camera-ready magic. Treat it like a ritual: tidy your space, pour something warm, and set a clear container of time so you can get in and out without decision fatigue. I like to glance at my content planner, highlight the shots I need, then set a time blocking timer for focused sprints. This turns filming into content batching—same setup, multiple deliverables—so creator productivity stays high and your energy feels consistent from clip to clip.
Start with sound, because dreamy visuals can’t save crunchy audio. Pick the quietest room, silence notifications, and drape soft fabrics nearby to dampen echo. Clip on a lavalier microphone and do a 10-second test recording at the volume you’ll actually speak; listen back for rustling, HVAC hum, or jewelry clinks. Keep the mic about a hand’s width from your mouth, secure cables under clothing, and switch your phone to airplane mode to avoid interference. If you’re filming on your phone, clap once at the start of each take to make syncing easy later. Have spare batteries or a battery pack nearby—nothing breaks flow like a mic dying mid-take.
Then craft flattering light and clean framing. Face a window if you can, and add a ring light for even glow on cloudy days, setting it just above eye level for that soft, catchlight sparkle. If the light is harsh, diffuse with a sheer curtain or parchment paper. Mount your camera on a sturdy tripod with phone mount, line your eyes along the top third of the frame, and leave a little headroom. Turn on gridlines, wipe the lens, and lock exposure so the shot doesn’t flicker. Style your background with one or two props tied to your topic, then film both horizontal and vertical versions—smart insurance for repurposing and easy social media tips later. Before you wrap, name your files clearly and snap a quick photo of your setup so next week’s content planning is plug-and-play. Consistency isn’t fussy; it’s simply repeating what works, one calm, well-lit take at a time.
From Drafts to Posts: Social Media Tips for Repurposing and Scheduling
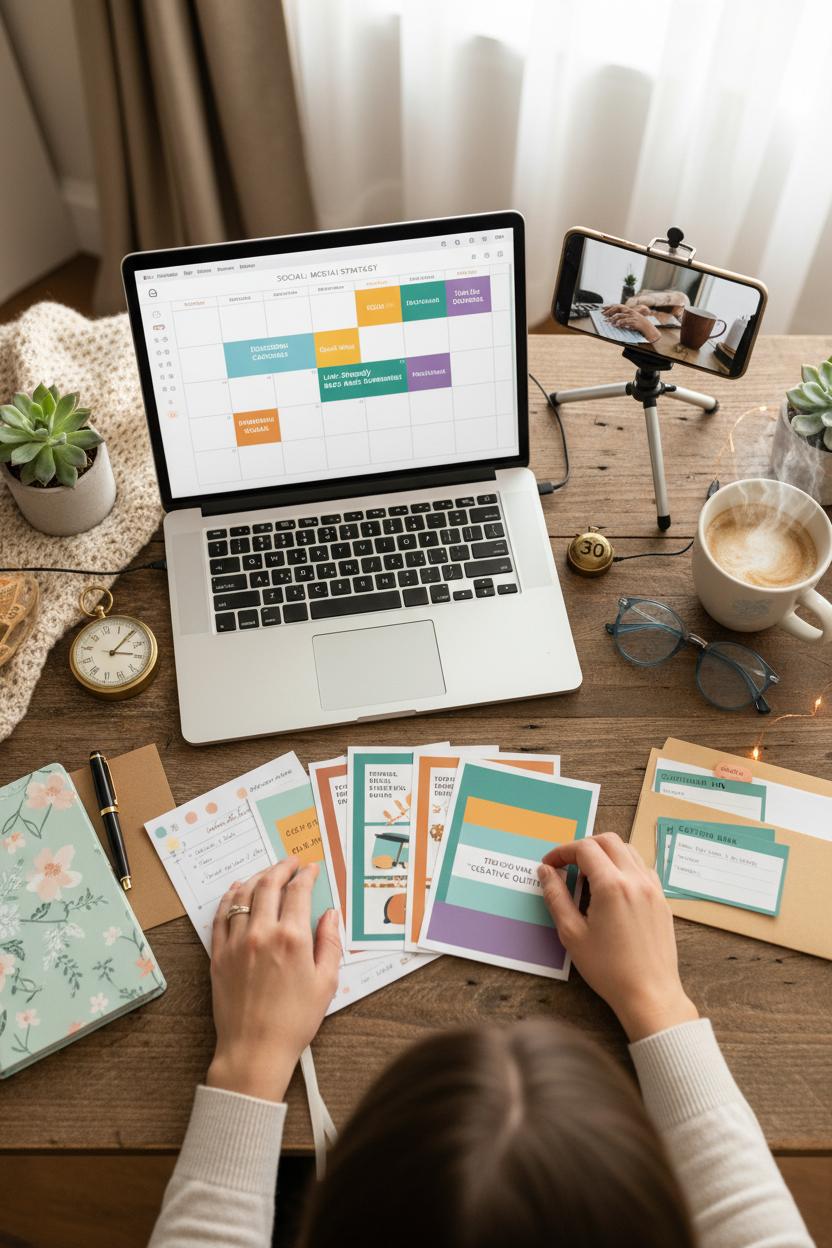
Once your ideas are sketched out, it’s time to shepherd them from rough drafts into scroll-stopping posts. I like to choose one anchor piece—say, a mini tutorial or a story-driven caption—and repurpose it across platforms so everything stays cohesive without feeling copy-pasted. From a single script, pull three bite-size quotes for carousels, one how-to Reel with B-roll, a Story with a poll, and a Pin that links back to your blog. This is where a thoughtful content creation workflow shines: you’re not reinventing the wheel, just styling it for each platform. Think of it as creative quilting—stitching the same fabric into different patterns. These social media tips keep your feed consistent while preserving your voice, and they make content batching feel more like a cozy ritual than a scramble.
Start by opening your content planner and color-coding the week’s themes so captions, visuals, and calls-to-action align. Set a time blocking timer for a focused 25–40 minutes and draft all hooks first (questions, bold claims, or quick wins). Next, film your anchor clip in one sitting: steady your phone on a tripod with phone mount, switch on a soft ring light, and clip on a lavalier microphone for crisp audio. Capture extra B-roll—typing, pouring coffee, behind-the-scenes—so you can layer text and reuse clips later. Batch graphics in the same palette to speed decisions, and keep a caption bank with three frameworks: story + lesson, tip list, and before/after. With simple content planning like this, you’ll glide from idea to asset to scheduled post, boosting creator productivity while leaving room for spontaneity.
When scheduling, pair platforms with purpose: educational carousels for Instagram, quick wins for Reels and TikTok, link-friendly summaries for Facebook and LinkedIn, evergreen visuals for Pinterest. Add keyword-rich alt text, tag relevant topics, and save your best-performing formats as templates to rinse and repeat. A once-a-week check-in to swap in timely posts keeps the plan flexible. And don’t forget a small “spares” folder—extra quotes and photos—for days when life gets busy. This gentle, repeatable content batching loop keeps your calendar full, your voice consistent, and your creative energy intact.
Creator Productivity Hacks: Automations, Shortcuts, and Checklists
Think of automations as the invisible studio assistants in your content creation workflow—quietly setting the scene while you sip your coffee. Start by connecting your content planner to simple triggers: when you drop a new idea into your Ideas column, have it automatically spin up a task list for scripting, filming, editing, and posting. Set your calendar to block focused slots and pair it with a time blocking timer that kicks on Do Not Disturb so you can glide into deep work. Save every vertical clip from a specific album straight to a cloud folder the second it hits your camera roll, and schedule drafts across platforms in one sitting so your week hums along while you’re off living it. Automation doesn’t replace your voice; it frees it.
Shortcuts are your creative fast lanes. Build a tiny library of templates—hooks, CTAs, caption structures, hashtag banks—so you can drag, drop, and personalize in minutes. Keep presets for your brand’s colors and covers so your grid looks cohesive without effort. Create a “one-touch studio” corner: tripod with phone mount already at eye level, ring light dialed to your favorite warmth, lavalier microphone coiled and plugged into a labeled pouch. When it’s time to film, you’re not hunting for cables; you’re stepping straight into the moment. For content batching days, prep a shot list and a reusable filming outline, and use voice notes to capture spontaneous lines that you can weave into your scripts later.
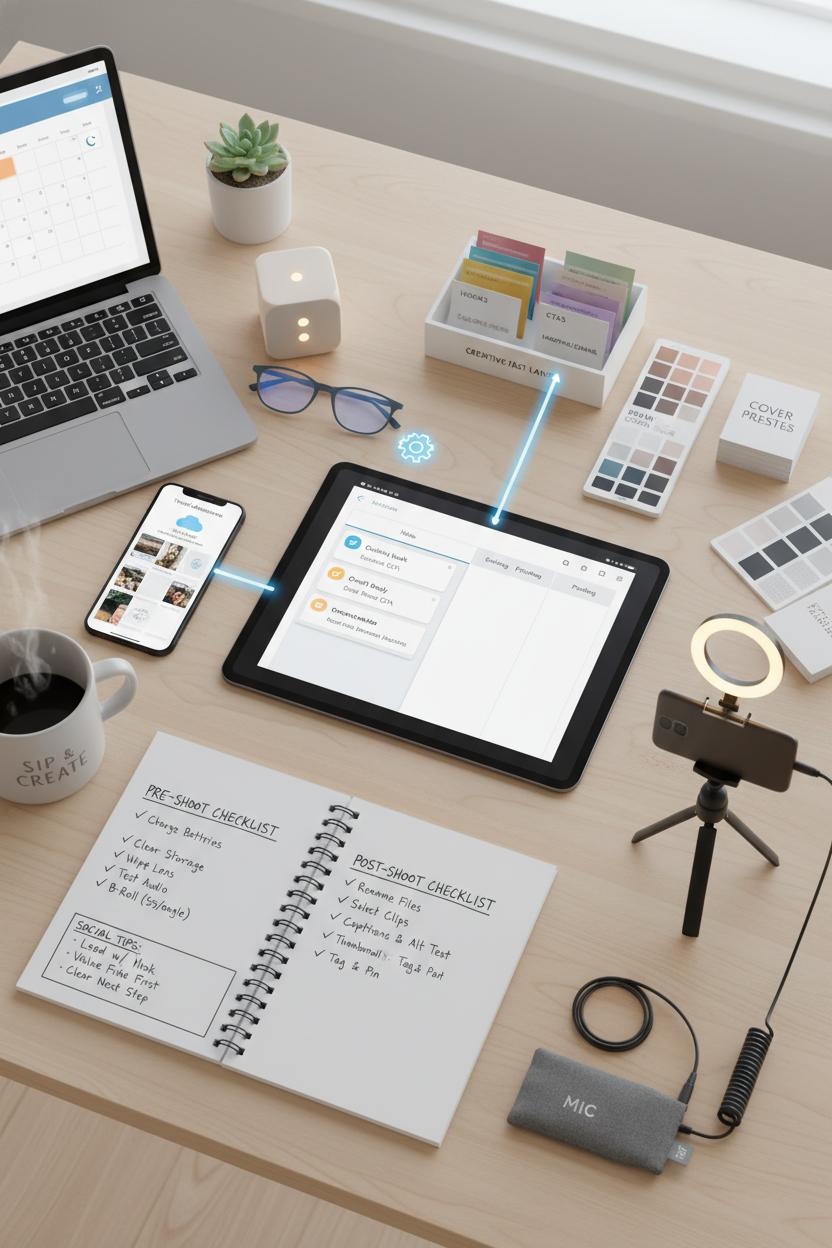
Checklists are where creator productivity becomes calm and repeatable. A pre-shoot checklist can be as cozy as it is practical: charge batteries, clear storage, wipe the lens, test audio, frame your hero shot, grab five seconds of B-roll per angle. A post-shoot checklist keeps momentum going: rename files, back up to cloud, select clips, rough cut, captions and alt text, thumbnail, tag, pin comment, cross-post. Add a quick pass for social media tips like leading with a hook, front-loading value, and a clear next step. During your 60-minute content planning session each week, pick one automation to set up, one shortcut to refine, and one checklist to simplify. Small tweaks, stacked together, turn scattered effort into a smooth, sustainable system.
The 60-Minute Run-Through: Step-by-Step Content Creation Workflow
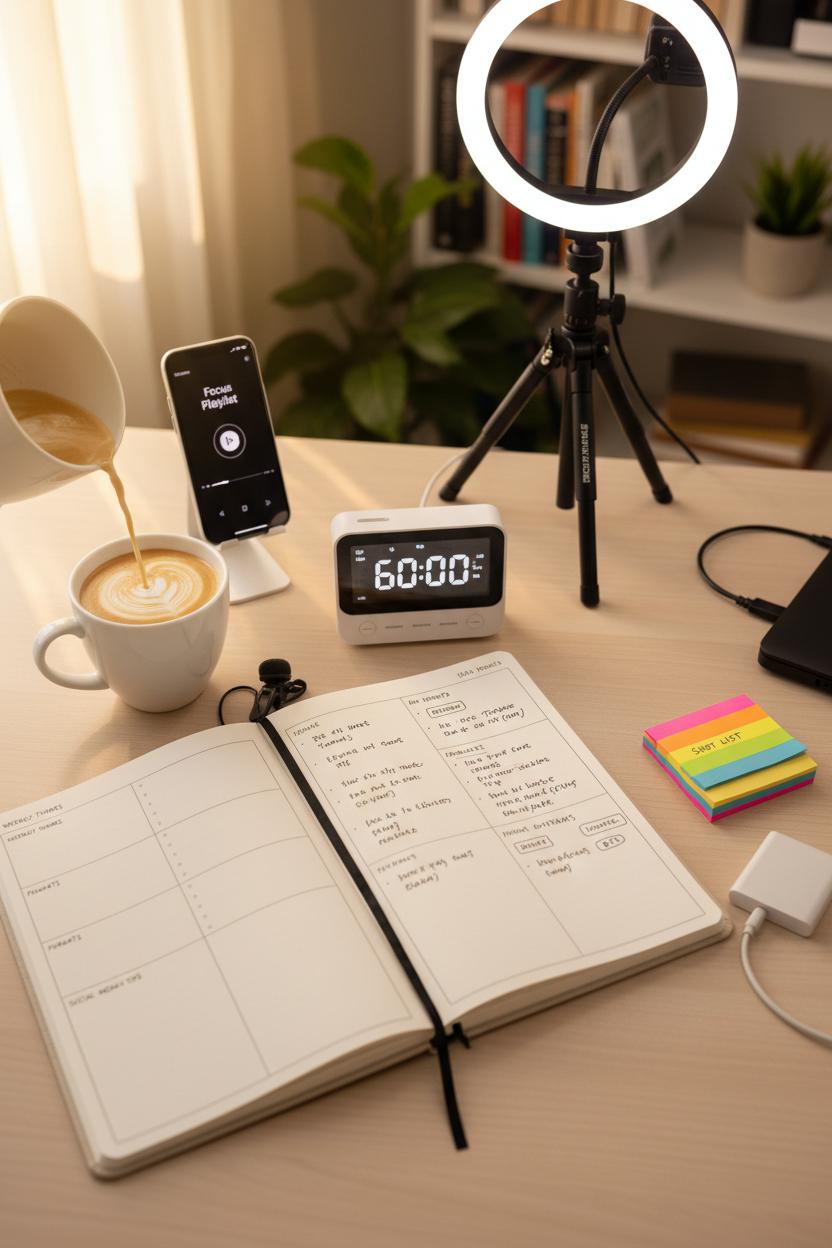
Set the scene: coffee poured, playlist on, time blocking timer set for 60, and your content planner open to a fresh page. Minutes 0–10 are for clarity. Skim your goals, upcoming launches, and any notes from last week’s analytics. Choose one or two weekly themes that align with your content pillars, then jot three audience pain points you can solve. This is the “why” behind your content planning. Add a quick list of formats you’ll use—carousel, Reel, story, newsletter—so your content creation workflow is anchored to purpose, not panic. Keep a running note of social media tips you want to test.
Minutes 10–25 are for idea sprints. Brain-dump headlines, hooks, and story prompts. Circle the best 3–5 and turn them into mini outlines: hook, key point, example, call to action. Think cross-platform right away so you can practice content batching: one core idea becomes a Reel, a carousel, a story sequence, and an email snippet. Tag each piece with a mood or vibe—educate, inspire, or behind-the-scenes—so your feed feels balanced. For creator productivity, decide the posting order now, while your brain is in strategy mode, not later when you’re tired.
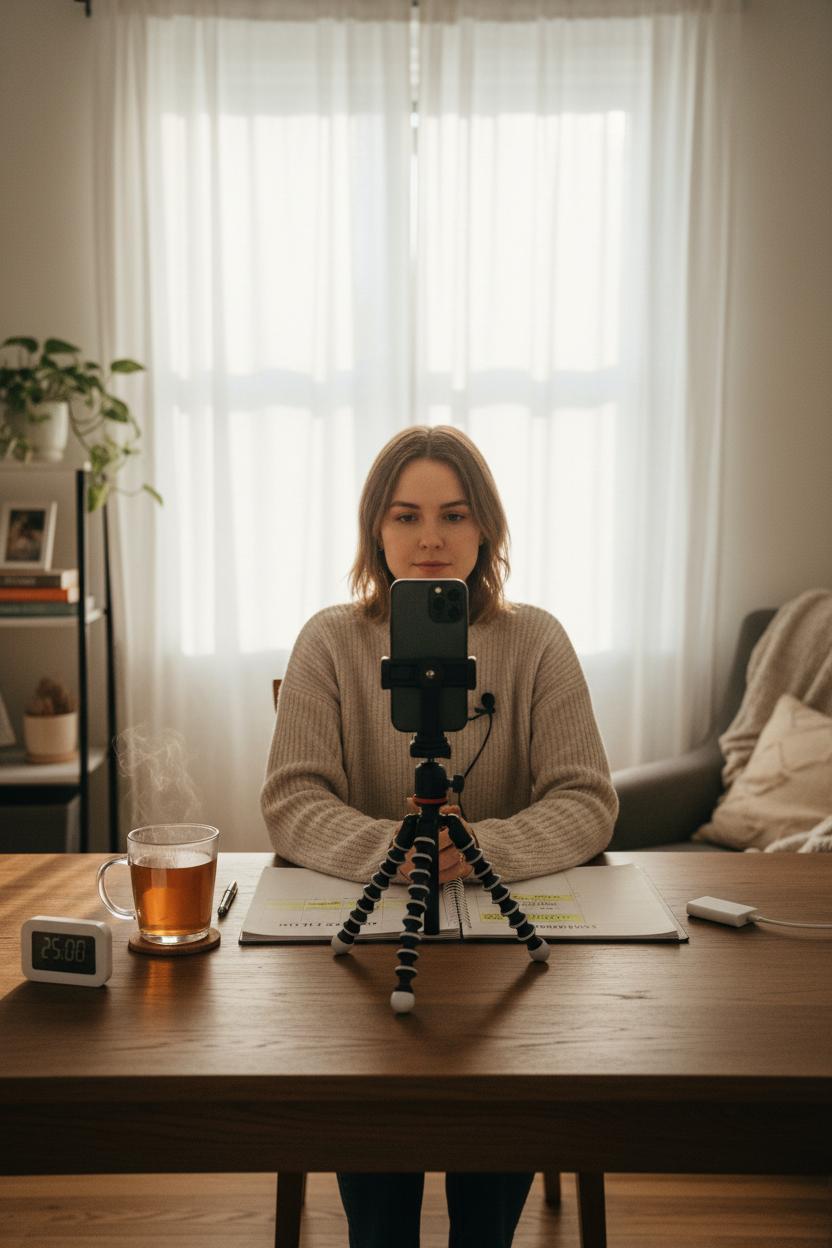
Minutes 25–45 are for fast, cozy production. Set up your tripod with phone mount, switch on the ring light, and clip on a lavalier microphone for crisp audio. Film A-roll first—tight, punchy takes—then capture B-roll of your workspace, hands, or a quick “day in the life” loop. Snap a few vertical photos for covers and Pinterest-friendly pins. Keep a sticky shot list on the desk so you don’t overthink. Leave out perfection, keep in momentum. If you need voiceovers, record three back-to-back while your energy matches.
Minutes 45–60 are your rapid edit-and-schedule block. Drop clips into a template, trim silence, and add captions. Write alt text, set your CTA, and paste your saved hashtags. Schedule posts, then drop B-roll and graphics into a labeled folder for future repurposing. Final pass: note what worked, park leftover ideas in your content planner, and set your next 60-minute session. Close the loop by resetting your space—battery charging, files backed up—so your content creation workflow is ready to run again tomorrow.
Review and Schedule: Edit, QA, and Publish in Your Content Planner

Now that your ideas are drafted, it’s time to give everything a slow, thoughtful polish and line it up in your content planner so it can go out on autopilot. I like to treat this as the “spa day” of my content creation workflow: brew something cozy, open your planner, and move post by post through a gentle QA pass. Read captions out loud to catch clunky phrasing, tighten your hooks, and make sure your CTA feels human and helpful. Double-check spelling, links, and tags, and confirm your visuals match the mood of your message. If you’re posting video, do a quick quality sweep: is your framing straight on the tripod with phone mount, is your ring light flattering and consistent, and does your lavalier microphone give you clean audio without rustle? Little tweaks now make your feed feel curated rather than chaotic, and they protect all the work you did during content batching.
Once each piece is tidy, shift into scheduling. In your content planner, place posts like puzzle pieces, spacing formats and topics for flow and variety. This is where content planning really shines: stagger reels and stills, alternate education with inspiration, and cluster related tips to build momentum. Use a time blocking timer to keep the session focused—fifteen minutes to refine visuals, fifteen to finalize captions and hashtags, fifteen to slot everything into the best time windows for your audience. Add accessibility touches like alt text and on-screen captions, and drop in a few evergreen social media tips as saved notes so you can reuse them across platforms. Before you hit publish or queue, confirm that your cover images are cohesive, your brand voice is consistent, and your analytics tags are ready to track results. The payoff is immediate creator productivity: your week is mapped, your posts are polished, and you’ve freed mental space for engagement and creativity instead of scrambling. Close your planner with a quick recap—what worked, what needs a fresh angle next week—and you’ll feel that quiet, confident click of a system that supports you, not the other way around.
Analyze and Iterate: Data-Driven Content Planning for Next Week

Settle in with a cozy drink and open your content planner—this is the gentle, grounding moment that transforms your content creation workflow from guessing to growing. Scroll through last week’s posts and note the quiet clues: saves, shares, comments, link clicks, watch time, and those DMs or story replies that revealed what truly resonated. Give yourself one focused half hour with a time blocking timer and choose your top three standouts. What do they have in common—topic, hook, format, length, or posting time? Did a short tip carousel spark conversation while a longer video underperformed, or did a chatty Reel keep attention because your opening line was irresistible? Capture it all like breadcrumbs you’ll follow into next week, with the warm trust that data is your friend, not your critic.
Now, translate those insights into next week’s content planning. If a quick how-to performed well, turn it into a three-part mini series; if a tutorial felt crowded, split it into bite-size steps and lean on content batching so you can film and edit in one effortless flow. Test a fresh hook on the same topic, swap a call-to-action, and try a different posting window—classic social media tips that compound creator productivity when you iterate rather than reinvent. If analytics hint that viewers dropped off in the first five seconds, tighten the intro and add captions; if low retention suggests visual or audio issues, set up a tripod with phone mount, switch on a ring light, and clip on a lavalier microphone for crisp, confidence-boosting clarity. Repurpose winners across platforms with slight tweaks—Pinterest-friendly covers, YouTube Shorts cuts, or a newsletter blurb that points back to your hero post.
Finally, sketch a simple “what worked/try next” dashboard right inside your content planner and map ideas to your pillars. Pencil in one batch filming block, one editing block, and one scheduling block, guided by the best-performing times you just uncovered. This is where strategy meets ease: a loop of testing, learning, and refining that makes next week feel lighter, sharper, and more intentional. With each small adjustment, your content creation workflow becomes less hustle and more rhythm—and that’s how sustainable, joyful momentum is made.
Conclusion
Here’s your cozy sign-off: with a clear content creation workflow, you can plan a week in just an hour—tea brewing, timer set, ideas batched, and posts scheduled. Lean into content planning, embrace content batching, repurpose smart, and let templates carry the load. Keep these social media tips close, leave room for creativity, and protect your energy. The result? Calmer calendars, consistent storytelling, and boosted creator productivity without the burnout. Light a candle, queue your drafts, and enjoy the ease of showing up—purposefully, beautifully, and right on time.