Ready to turn your scroll time into a standout brand? This guide on how to become a content creator shares practical content creator tips, a simple content creation workflow, and a beginner-friendly social media strategy to help you post with purpose in the booming creator economy. Start with what you have—a phone, good light—and upgrade smart: ring light, smartphone tripod, USB microphone, or a phone gimbal. We’ll cover planning, batching, and beginner video editing software so you can publish confidently today. Pin now, create later—your first viral post is closer than you think.
Step 2: Map Your Content Creation Workflow From Ideas to Publishing
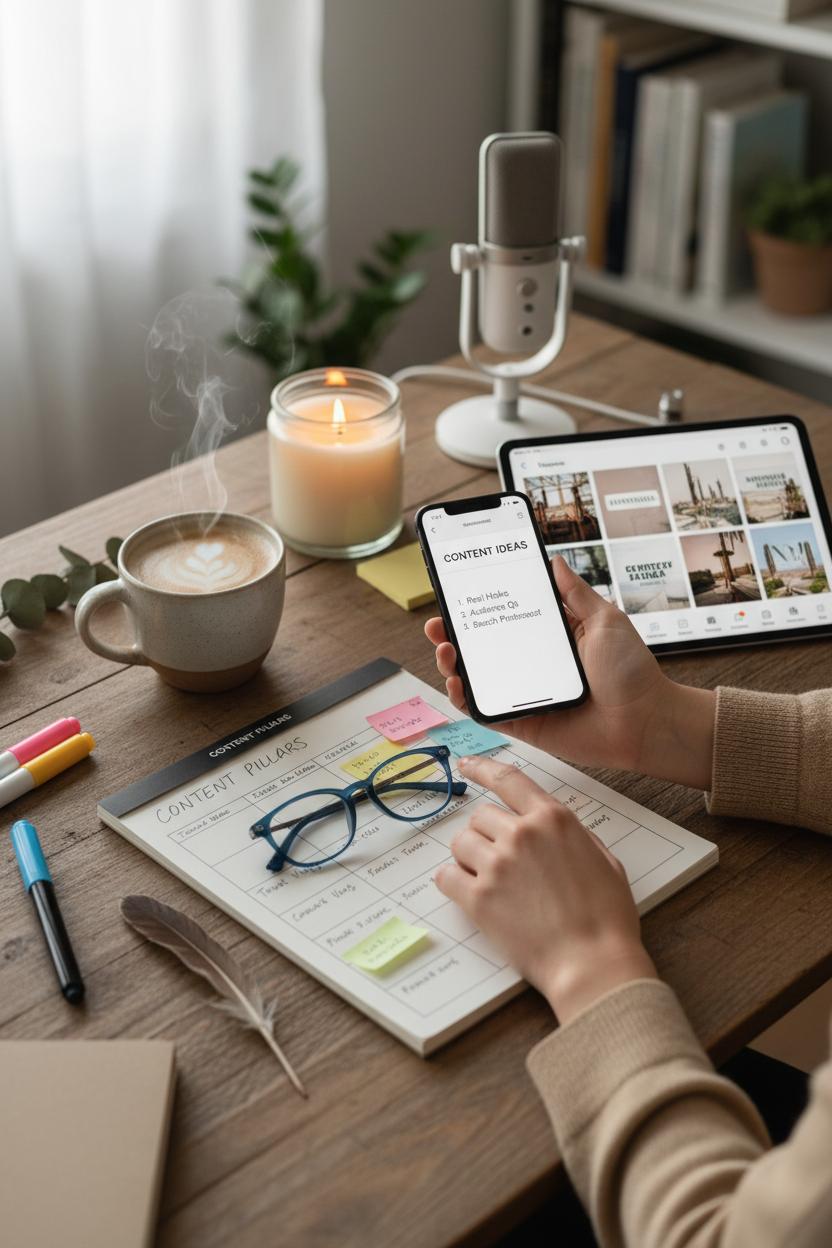
Think of your content creation workflow as a cozy, repeatable ritual that carries an idea from spark to “publish.” Start by making idea capture effortless: keep a running note on your phone, save inspiring posts to a mood board, and collect audience questions in one place. Then sort those ideas into a few content pillars so you’re not reinventing the wheel every week. For each idea, write a tiny brief with the hook, value, and desired action. Sketch a quick storyboard or shot list, and outline your headline, caption, and tags right there. One of my favorite content creator tips is to batch this planning phase—sip your coffee, light a candle, and map a week (or month) of ideas in one sitting. It’s the simplest answer to how to become a content creator without the stress of starting from scratch every day.
Production gets easier when you set up a simple toolkit you can grab in minutes. Good lighting and sound are half the battle, so keep a ring light and USB microphone within reach, and stabilize your phone with a smartphone tripod. If you film on the go, a phone gimbal keeps footage buttery smooth. Batch shoot by pillar: capture A-roll, then snag B-roll cutaways, close-ups, and transitions. Name files consistently so editing doesn’t turn into a scavenger hunt. In your video editing software, create reusable presets for color, captions, and transitions; save export templates sized for each platform. While clips are rendering, polish your copy: craft a strong first line, add scannable breaks, and prep alt text, keywords, and a CTA that points to your next step.
Finally, move into distribution with intention. Drop content into a simple editorial calendar and assign each piece a platform-specific twist to match your social media strategy. Schedule posts, save your hashtag sets and link snippets, and build a mini feedback loop: after publishing, check performance, audience saves, and comments, then jot what worked into your template for next time. Repurpose winners across formats—turn a Reel into a carousel, a tutorial into a pin, a live into a blog—so each idea travels farther in the creator economy. Protect your creative rhythm with weekly checkpoints, and let your system do the heavy lifting while you stay in the flow.
Step 3: Assemble Starter Gear—Ring Light, Smartphone Tripod, USB Microphone, and a Phone Gimbal
Before you hit record, set yourself up with a simple, confidence-boosting kit: a ring light, a smartphone tripod, a USB microphone, and a phone gimbal. Think of these as your friendly crew behind the camera—quietly doing the heavy lifting so your ideas shine. A ring light evens out shadows and gives skin that soft, glowy finish whether you’re filming in a tiny apartment or a sunny kitchen. Look for one with adjustable brightness and color temperature so you can match golden-hour warmth or crisp daylight. The smartphone tripod is your steady-handed assistant—no shaky shots, no awkward propping on books—and a remote shutter is a tiny miracle for solo filming. If you’re wondering how to become a content creator without a huge budget, this is the starter kit that stretches far in the creator economy.
Your audio matters just as much as your visuals, which is where the USB microphone comes in. It’s a plug-and-play upgrade for voiceovers, tutorials, and podcast-style videos, lending that clean, intimate sound people will actually stick around for. Prefer moving and talking? Pair your phone with a small lav mic for walk-and-talks, then switch back to the USB mic for sit-down segments. Meanwhile, a phone gimbal opens the door to buttery-smooth B-roll—kitchen pours, desk setups, outfit swishes—that instantly makes your feed feel cinematic. Practice a few easy moves (slow pans, gentle push-ins) and your clips will look like you’ve got a camera operator in the room. These are simple, practical content creator tips that fit any social media strategy, whether you’re building on TikTok, Instagram, or YouTube Shorts.
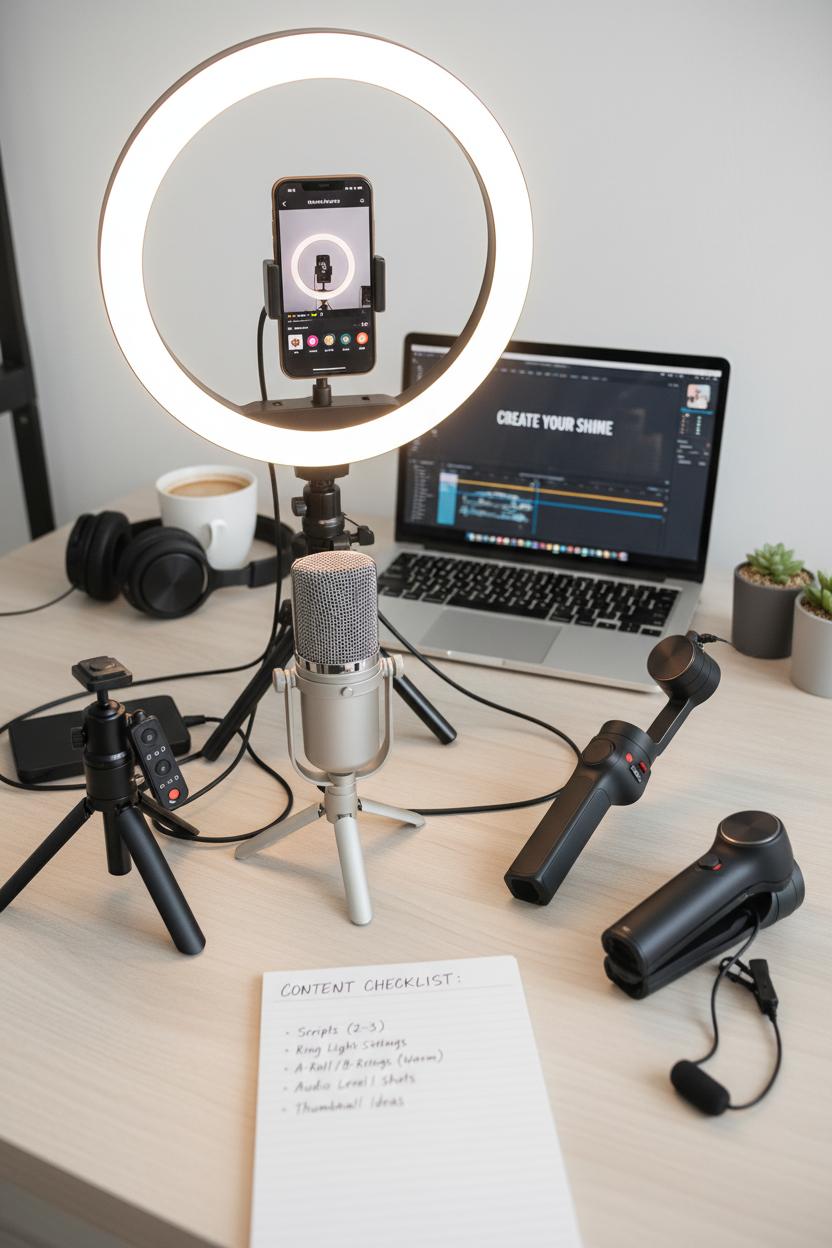
The real magic happens when you weave this gear into your content creation workflow: batch two or three scripts, set up your tripod once, lock in your ring light settings, capture a mix of A-roll and gimbal B-roll, and finish with quick edits in beginner-friendly video editing software. Keep a notes app checklist for shots, audio levels, and thumbnail ideas so your process stays cozy, repeatable, and stress-free. Start with what you have, add one upgrade at a time, and let your style evolve. Consistency, not perfection, is what grows an audience—and your starter kit is the sweetest shortcut to showing up with polish every single time.
Step 4: Craft a Social Media Strategy and Posting Schedule
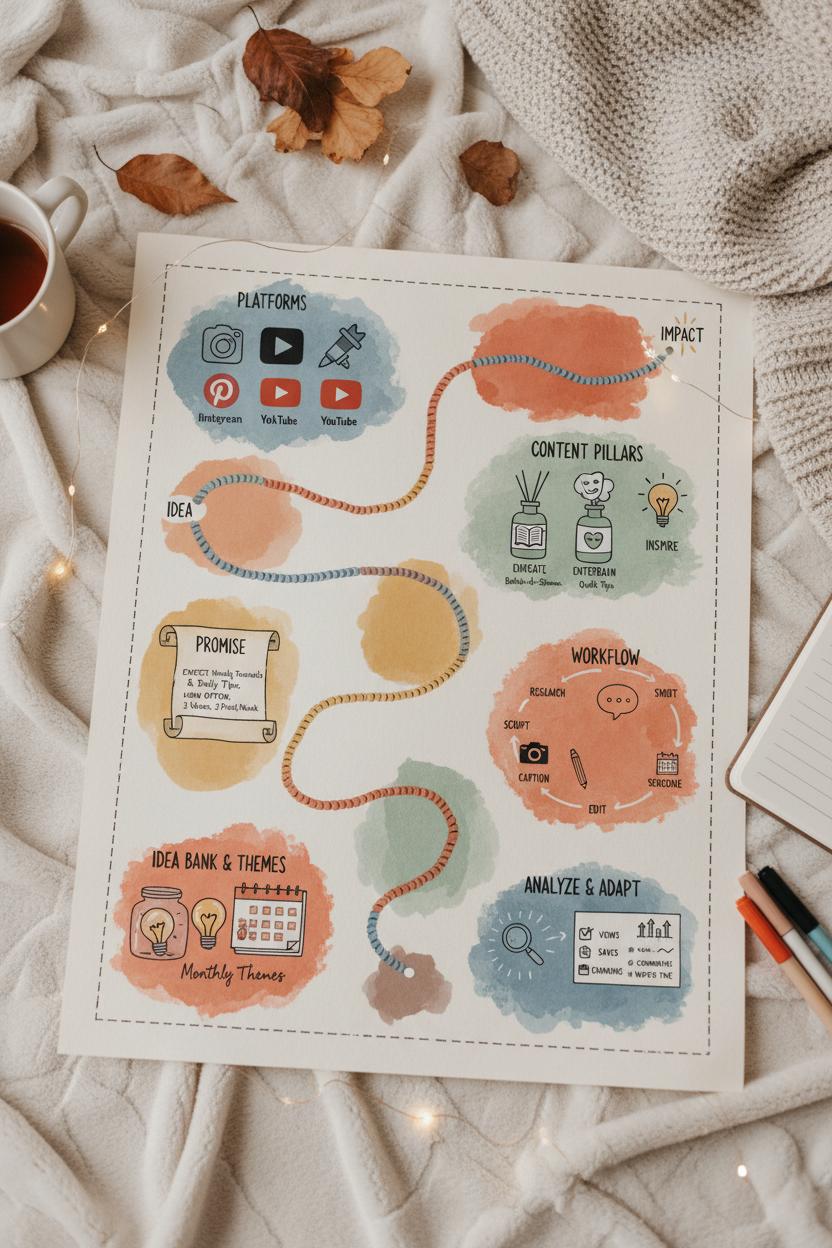
Think of your social media strategy as the cozy, color-coded map that guides your content from idea to impact. Start by choosing the platforms where your dream audience actually hangs out and define 3–5 content pillars that feel like your brand’s signature scents—recurring themes that make your feed feel cohesive and recognizable. Are you educating, entertaining, or inspiring? Will you show behind-the-scenes peeks, quick tips, or longer tutorials? In the creator economy, clarity beats chaos, so write a simple promise to your audience—what they can expect from you and how often—and let that promise shape your visuals, captions, and calls to action. If you’ve wondered how to become a content creator without burning out, this is the moment you turn intention into a plan.
Next, set a posting schedule that matches your season of life. Choose a sustainable cadence (for example, three short-form videos and two static posts per week) and batch your work. Map a gentle content creation workflow—research, script, shoot, edit, caption, schedule—and block time on your calendar for each step. Keep a running idea bank and pair it with monthly themes to make planning easier. Cross-pollinate without copy-pasting; what performs on Reels may need a tighter hook on TikTok or a carousel on Pinterest. Sprinkle in content creator tips, story-driven captions, and clear CTAs. Track the basics weekly—views, saves, comments, watch time—and let the data whisper what to do more of. Test posting times, hooks, and cover images, but keep your voice steady and kind.
Finally, support your plan with simple tools that make you feel professional without overcomplicating things. A ring light and USB microphone elevate audio and glow for desk recordings, a smartphone tripod keeps hands-free shots steady, and a phone gimbal smooths out those dreamy walk-and-talks. Build a B-roll library whenever the light is pretty and edit with user-friendly video editing software so you can create quickly on busy days. Save caption templates, hook formulas, and brand keywords so you can write faster. The goal is a rhythm that feels like you—consistent, warm, and adaptable—so your presence grows steadily while leaving room for real life and creative play.
Step 5: Shoot, Edit, and Optimize—Content Creator Tips Using Video Editing Software
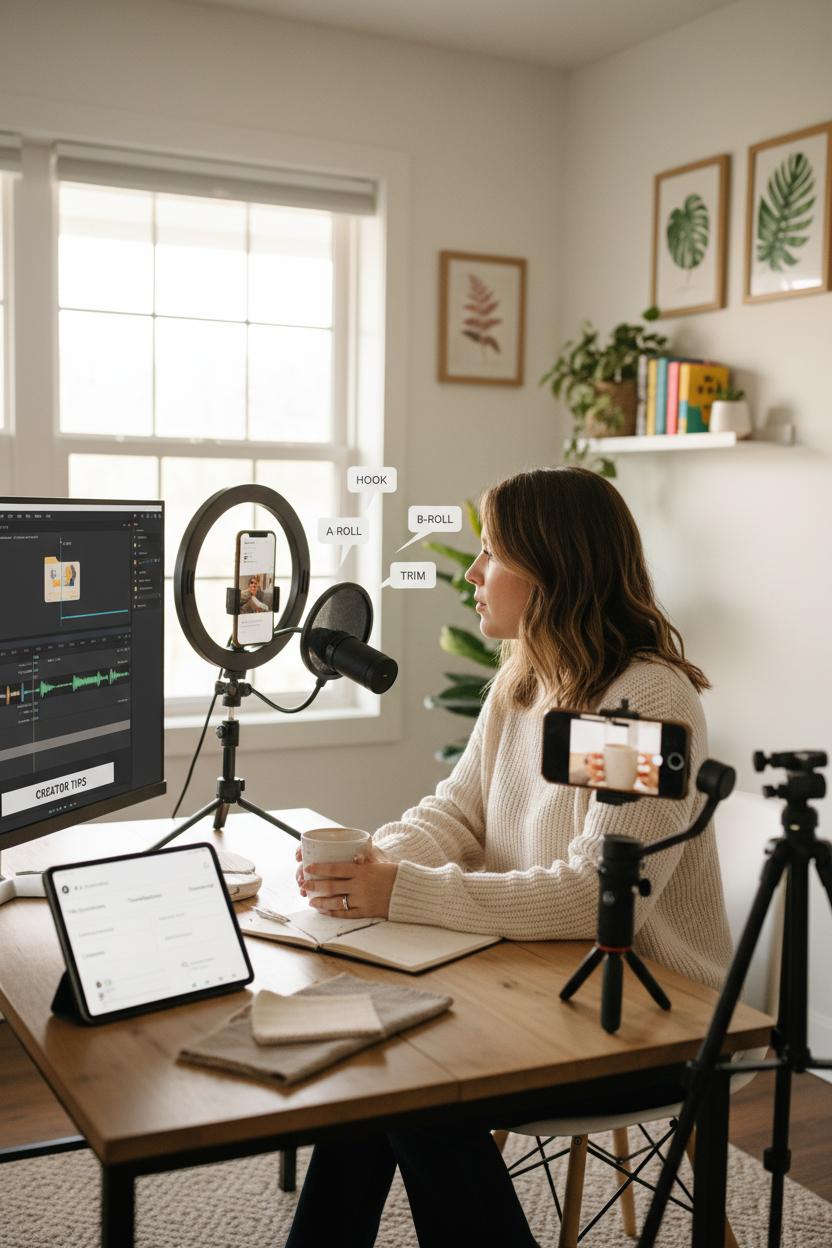
This is the fun part—lights on, camera rolling. Start by storyboarding your idea with a quick shot list so you’re not scrambling when the inspiration hits. For clean, flattering visuals, face a window or pop on a ring light, and keep your background simple and on-brand. Stabilize with a smartphone tripod for hands-free framing, and grab movement shots with a phone gimbal for that silky glide. Audio matters more than you think, so plug in a USB microphone and record a few seconds of room tone to smooth edits later. Capture A-roll for your core message and a sprinkle of B-roll—hands, textures, behind-the-scenes moments—to layer in depth. These practical content creator tips make even a small setup feel cinematic, and they’re the simplest answer to anyone asking how to become a content creator without buying a full studio.
When you sit down to edit, import everything into clearly labeled folders, then open your favorite video editing software and start with the hook: what will make someone watch the first three seconds? Trim ruthlessly, cut filler words, and keep the pacing snappy with intentional pauses. Add on-screen captions and simple text callouts for accessibility and scroll-stopping clarity. Sweeten colors with a light grade and balance audio so your voice is crisp and cozy against background music. Save time by building templates—intro, lower-thirds, end screen—and batch export for different aspect ratios so you have vertical Reels, square carousels, and widescreen YouTube ready to go. If your footage is shaky or noisy, lean on stabilization and noise reduction tools sparingly; a little polish goes a long way in a sustainable content creation workflow.
Finally, optimize like a pro. Craft titles and descriptions that promise a benefit, choose a clear thumbnail, and add chapters where it makes sense. Sprinkle in keywords your audience is already searching, align each post with your social media strategy, and include a gentle call to action. Schedule uploads when your community is most active, then review retention and watch-time to see where viewers drop and refine the hook in your next edit. Repurpose one idea across platforms, updating captions and cuts to match the vibe. This is how you show up consistently in the creator economy—shoot with intention, edit with empathy, and optimize with curiosity.
Step 6: Publish, Measure, and Iterate—Data-Driven Content Creator Tips
You’ve created the thing—now lovingly send it into the world and let the numbers whisper back. Publishing isn’t the finish line; it’s the beginning of a feedback loop. Start with a simple social media strategy: choose one or two platforms, define a clear goal (grow email list, drive saves, sell a digital product), and pick a north-star metric that matches it. On Instagram, watch saves and shares; on TikTok, check retention and average watch time; on YouTube, monitor click-through rate and view duration; on Pinterest, track outbound clicks; for email, open and click rates. Post when your audience is most active, then look for patterns in the first hour and the first 24 hours. These content creator tips are the heartbeat of how to become a content creator who grows with intention in the creator economy.
Build a simple dashboard (Notion or a spreadsheet works) to log each post: date, platform, format, hook, thumbnail, caption, time posted, and results—reach, CTR, watch time, saves, comments, shares, follows, link clicks, revenue. Tag your content pillars and creative variables so you can spot what consistently lands. Run weekly retros: the three best posts and why, the three softest and why, plus one hypothesis to test next week. A/B test thoughtfully—swap only one variable at a time (hook, thumbnail, first three seconds, or CTA) to keep your read clean. Keep your production quality consistent so the data reflects the idea, not the gear: use the same ring light, smartphone tripod, USB microphone, and phone gimbal when possible. Speed up your iteration with streamlined video editing software and track links with UTMs so you can see exactly what drives action.
When something works, squeeze the juice. Repurpose a winning hook into multiple formats: a Reel that becomes a YouTube Short, a TikTok turned carousel, a post expanded into a blog or newsletter. Create follow-ups, “part twos,” and series that deepen the story. Over time, your content creation workflow turns into a cozy, predictable rhythm: publish, measure, learn, refine, repeat. That’s the quiet magic—data meeting creativity—where your voice gets clearer, your audience feels seen, and your growth becomes sustainable. Keep showing up, and let your numbers be your north star.
Conclusion
And that’s your gentle nudge to start. With these content creator tips, you know how to become a content creator: choose your niche, map a simple content creation workflow, post with purpose, and refine your social media strategy as you learn. Keep curiosity close, metrics light, and momentum cozy—small daily steps stack into big wins. Share what you love, serve your audience, and you’ll find your place in the creator economy. Brew a coffee, set a 30‑minute timer, and hit publish. Your next piece could be the one that opens the door.